Vice 2016 Color Block Nail Art Tutorial by Peachy Polish

Valesha of PeachyPolish.com is a guest contributor to the Cirque Colors blog. Read on for an easy color block nail art tutorial featuring our Vice 2016 Collection. Hi everyone! If you visited the blog yesterday, you probably saw my swatches of the fabulous 2016 Vice Collection from Cirque Colors! It's the most perfect mix of neons which makes them ideal to create some fun nail art. I've never done color block nail art before, if you can believe it but this collection gave me all the color block feels! Today, I have a little nail art tutorial for you using these gorgeous colors. The look is simple enough that even a nail art novice can achieve it but it still packs a big punch and it's bound to get you noticed wherever you go this Summer. Keep reading to find out how to get the look! Step 1 Start off with clean, manicured nails. Push back your cuticles, shape your nails using a nail file, like the Cirque Colors Crystal Nail File, finish off with some of Cirque Colors' Tea Tree Cuticle Oil and let it soak into your skin, leaving your cuticles nice and hydrated. Don't forget to wipe the excess oil off your nail bed with isopropyl alcohol or 100% acetone before you start painting. Step 2 Apply one coat of Cirque Colors' Hold Fast Base Coat to create a base for your nail art. Allow it to dry. Step 3 Apply the first coat of your base color. I used Cirque Colors Carpe Diem because white always makes a good base but you could choose any of the Vice Collection colors since they all compliment each other so well! Step 4 Apply your second coat of Carpe Diem. Once you've completed the second coat of your base color, it is essential that you let it dry entirely before proceeding to the next step! Step 5 After your base color has dried completely (1 - 2 hours; even if it feels dry, it's not always completely dry! When in doubt, allow extra drying time) apply a nail vinyl, striping tape or scotch tape down the center of your nail. I chose a nail vinyl but any sort of tape with work equally as well. Step 6 Using the 2016 Vice Collection pick a shade and apply it to one side of the nail vinyl or tape, ensuring that you don't get it on the opposite side. If you don't have a steady hand you could use a small paint brush for this part. Here, I'm using Electric Daisy, a perfectly chartreuse neon creme! Step 7 Once you've applied your neon polish of choice, remove the nail vinyl or tape immediately but slowly so you keep a nice, precise line. Repeat steps 5 - 7 on each nail, completing one nail at a time. Step 8 You could stop there but why not add a little extra dimension and pizzazz? Place a small droplet of Cirque Colors Memento Mori to piece of foil or plastic lid. Step 9 Using a small fan paint or nail art brush, very gently dip the ends of the brush into the puddle of Memento Mori. If you get too much polish on your brush dab off the polish on a scrap piece of paper. We only need a very small amount because a little goes a long way. Step 10 Very lightly, tap the ends of the brush on your nail creating random black speckles which perfectly compliments the bright neon and white pairing! Let your speckles dry completely. Repeat steps 9 - 10 for each nail. Step 11 If you get any of the black speckles on your skin, do not fret! You can clean it up quickly and easily with a brush and acetone! Step 12 Last but most importantly, you are going to want to seal your design to make sure it lasts so you can enjoy your nail art for days to come! Using Cirque Colors Liquid Laminate Top Coat, apply a coat on top of your design with a light hand, so as not to smear your design. Voila! You are finished! You could add your own spin to this look by doing different color block shapes, using multiple colors on each nail, doing a black and white color block with neon speckles, there are just so many options. I used Plastik on my pointer finger, Sin City on my middle finger, Electric Daisy on my ring finger, High Roller on my pinkie and Rehab on my thumb (not pictured). I just couldn't take my eyes off of my nails once I was finished! I hope you guys enjoyed this tutorial! If you choose to recreate the design, make sure you tag me and Cirque Colors on social media! You can find all the polishes you need to create this look on Cirque Colors' website. You can also follow Cirque Colors on social media here → FACEBOOK | INSTAGRAM | TWITTER | PINTEREST About: Valesha is the blogger behind PeachyPolish.com. Her work has been featured by Deborah Lippmann, Zoya, China Glaze, Sally Hansen and Nail It! magazine. She's collaborated with brands such as KBShimmer and Rescue Beauty Lounge to create polishes that convey her love for everything colorful and sparkly. When she's isn't polishing her nails, she's spending time with family and friends, cuddling with her two Siamese kitties, furthering her Graphic Design skills, binge-watching all of her favorite TV shows and enjoying the beautiful Pacific Northwest with her husband.

Vice 2016 Color Block Nail Art Tutorial by Peachy Polish

Valesha of PeachyPolish.com is a guest contributor to the Cirque Colors blog. Read on for an easy color block nail art tutorial featuring our Vice 2016 Collection.


Hi everyone! If you visited the blog yesterday, you probably saw my swatches of the fabulous 2016 Vice Collection from Cirque Colors! It's the most perfect mix of neons which makes them ideal to create some fun nail art. I've never done color block nail art before, if you can believe it but this collection gave me all the color block feels!

Today, I have a little nail art tutorial for you using these gorgeous colors. The look is simple enough that even a nail art novice can achieve it but it still packs a big punch and it's bound to get you noticed wherever you go this Summer. Keep reading to find out how to get the look!

Step 1

Start off with clean, manicured nails. Push back your cuticles, shape your nails using a nail file, like the Cirque Colors Crystal Nail File, finish off with some of Cirque Colors' Tea Tree Cuticle Oil and let it soak into your skin, leaving your cuticles nice and hydrated. Don't forget to wipe the excess oil off your nail bed with isopropyl alcohol or 100% acetone before you start painting.

Step 2

Apply one coat of Cirque Colors' Hold Fast Base Coat to create a base for your nail art. Allow it to dry.

Step 3

Apply the first coat of your base color. I used Cirque Colors Carpe Diem because white always makes a good base but you could choose any of the Vice Collection colors since they all compliment each other so well!

Step 4

Apply your second coat of Carpe Diem. Once you've completed the second coat of your base color, it is essential that you let it dry entirely before proceeding to the next step!

Step 5

After your base color has dried completely (1 - 2 hours; even if it feels dry, it's not always completely dry! When in doubt, allow extra drying time) apply a nail vinyl, striping tape or scotch tape down the center of your nail. I chose a nail vinyl but any sort of tape with work equally as well.

Step 6

Using the 2016 Vice Collection pick a shade and apply it to one side of the nail vinyl or tape, ensuring that you don't get it on the opposite side. If you don't have a steady hand you could use a small paint brush for this part. Here, I'm using Electric Daisy, a perfectly chartreuse neon creme!

Step 7

Once you've applied your neon polish of choice, remove the nail vinyl or tape immediately but slowly so you keep a nice, precise line. Repeat steps 5 - 7 on each nail, completing one nail at a time.

Step 8

You could stop there but why not add a little extra dimension and pizzazz? Place a small droplet of Cirque Colors Memento Mori to piece of foil or plastic lid.

Step 9

Using a small fan paint or nail art brush, very gently dip the ends of the brush into the puddle of Memento Mori. If you get too much polish on your brush dab off the polish on a scrap piece of paper. We only need a very small amount because a little goes a long way.

Step 10

Very lightly, tap the ends of the brush on your nail creating random black speckles which perfectly compliments the bright neon and white pairing! Let your speckles dry completely. Repeat steps 9 - 10 for each nail.

Step 11

If you get any of the black speckles on your skin, do not fret! You can clean it up quickly and easily with a brush and acetone!

Step 12

Last but most importantly, you are going to want to seal your design to make sure it lasts so you can enjoy your nail art for days to come! Using Cirque Colors Liquid Laminate Top Coat, apply a coat on top of your design with a light hand, so as not to smear your design.

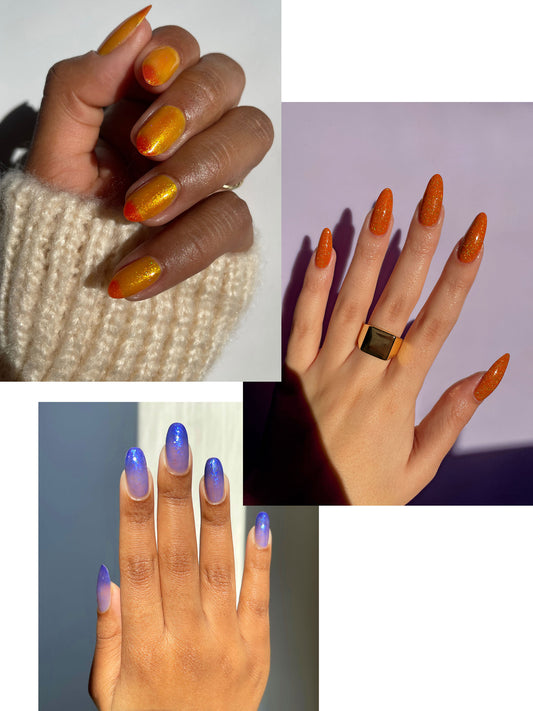
Voila! You are finished! You could add your own spin to this look by doing different color block shapes, using multiple colors on each nail, doing a black and white color block with neon speckles, there are just so many options. I used Plastik on my pointer finger, Sin City on my middle finger, Electric Daisy on my ring finger, High Roller on my pinkie and Rehab on my thumb (not pictured). I just couldn't take my eyes off of my nails once I was finished!

I hope you guys enjoyed this tutorial! If you choose to recreate the design, make sure you tag me and Cirque Colors on social media!

You can find all the polishes you need to create this look on Cirque Colors' website.

You can also follow Cirque Colors on social media here
→ FACEBOOK | INSTAGRAM | TWITTER | PINTEREST

About:
Valesha is the blogger behind PeachyPolish.com. Her work has been featured by Deborah Lippmann, Zoya, China Glaze, Sally Hansen and Nail It! magazine. She's collaborated with brands such as KBShimmer and Rescue Beauty Lounge to create polishes that convey her love for everything colorful and sparkly. When she's isn't polishing her nails, she's spending time with family and friends, cuddling with her two Siamese kitties, furthering her Graphic Design skills, binge-watching all of her favorite TV shows and enjoying the beautiful Pacific Northwest with her husband.

Back to blog